Networking ColonyCam
You can network ColonyCam using two methods: a direct connection to your personal computer or by placing it on a LAN with a static IP. The direct connection is useful for linking ColonyCam directly to a single computer, while the LAN method connects it to a broader network. Below are the steps for each method.
Networking ColonyCam via Direct Connection (Peer-to-Peer)
Overview:
This method allows you to connect ColonyCam directly to another computer using an Ethernet cable. This is useful when no network infrastructure (router or switch) is available.
Steps:
Connect the Ethernet Cable:
- Plug one end of the Ethernet cable into ColonyCam and the other end into your computer.
Open Network Settings on ColonyCam:
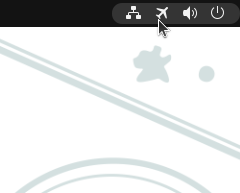
- Click on the system tray in the top-right corner of the screen.
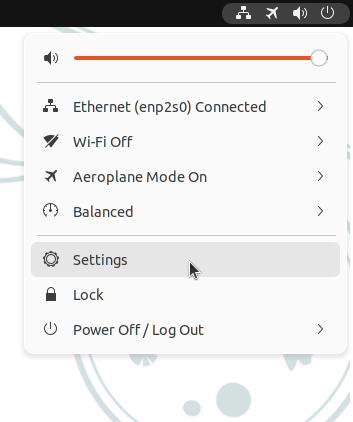
- Select Settings in the drop-down menu.
Configure a Static IP Address:
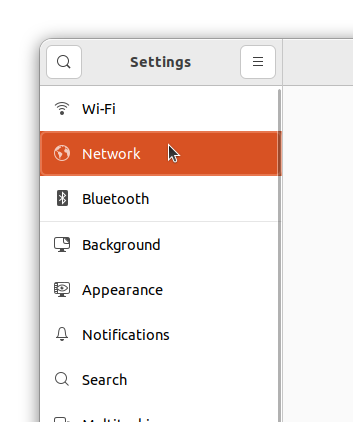
- In the left-hand menu, select Network.
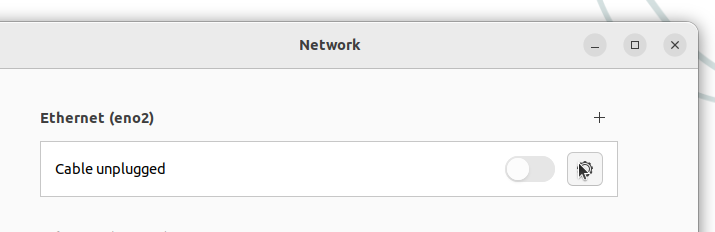
- In the Network tab, there will be two Ethernet ports displayed. Edit the settings for Ethernet (eno2) by clicking on the gear icon. It is imperative to only amend the settings for this Ethernet port.
-
In the window that appears, go to the IPv4 tab.
-
Change the IPv4 Method from Automatic (DHCP) to Manual.
-
Enter the following details:
- Address: Enter the static IP address you have provisioned for ColonyCam, e.g.,
192.168.1.1. - Netmask: Typically
255.255.255.0. - Gateway: Leave this field empty.
- Address: Enter the static IP address you have provisioned for ColonyCam, e.g.,
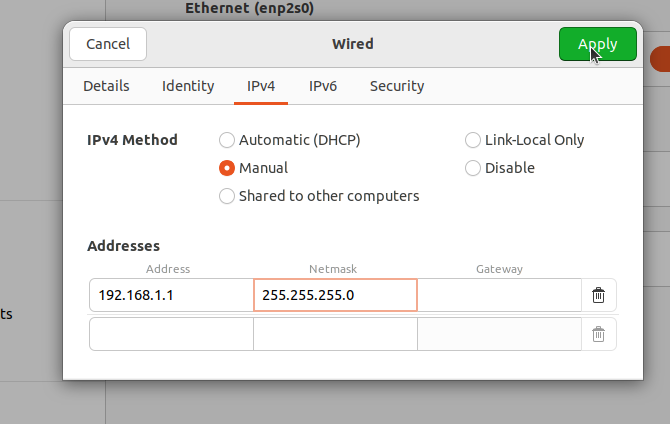
- Click Apply to save the changes.
Configuring your computer:
- Assign your computer a static IP in the same range, e.g.,
192.168.1.2with a subnet mask of255.255.255.0. - The steps to do this will vary depending on the operating system running on your computer.
Test the Connection:
- After configuring both machines, try pinging the address of the ColonyCam from your computer to ensure the connection is working.
ColonyCam is now networked via direct connection.
Please restart the ColonyCam at this point.
Networking ColonyCam via LAN with a Static IP
Overview:
This method connects ColonyCam to a local area network (LAN) with a static IP address, allowing it to communicate with other devices on the same network.
Steps:
Connect ColonyCam to the Network:
- Plug the Ethernet cable into ColonyCam and connect the other end to your router, switch, or network wall socket.
Open Network Settings on ColonyCam:
- Click on the system tray in the top-right corner of the screen.
- Select Settings in the drop-down menu.
Configure a Static IP Address:
- In the left-hand menu, select Network.
- In the Network tab, there will be two Ethernet ports displayed. Edit the settings for Ethernet (eno2) by clicking on the gear icon. It is imperative to only amend the settings for this Ethernet port.
-
In the window that appears, go to the IPv4 tab.
-
Change the IPv4 Method from Automatic (DHCP) to Manual.
-
Enter the appropriate network settings for your LAN:
- Address: Enter the static IP address you have provisioned for ColonyCam, e.g.,
192.168.1.100. - Netmask: Typically
255.255.255.0. - Gateway: Leave this field empty.
- Address: Enter the static IP address you have provisioned for ColonyCam, e.g.,
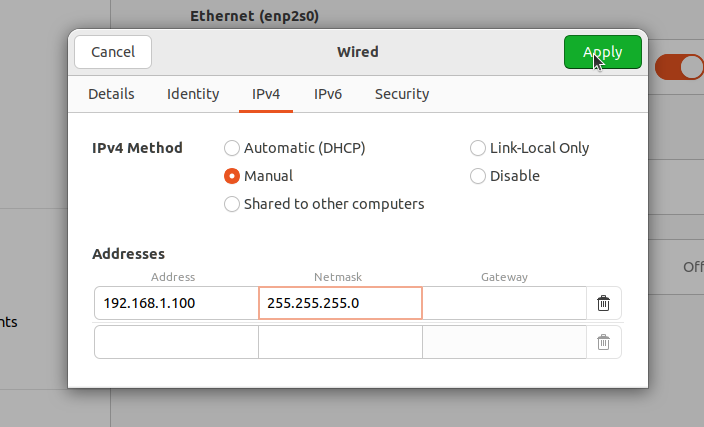
- Click Apply to save the changes.
Verify the Connection:
- Ensure that ColonyCam is connected to the network by accessing other devices on the LAN or performing a ping test.
ColonyCam is now networked on the LAN with a static IP.
Please restart the ColonyCam at this point.